On the bench - Dovetail cutting jig
Travelling Anarchist Tool Chest
I am building the travelling anarchist tool chest project, from the Wood Whisperer Guild. All the corner joints of the main carcasse and some components of the lid are dovetail joints.
When building carcasses, it is pretty common that the corners are dovetailed, like this chest. Many ways and techniques do exists and a lot are well documented in many ways. By it using power tools, hand tools or some combination of either of the type of tools.
I will typically opt for a combination, somewhat of a hybrid approach to use the best possible method that I find suit. Typically, a dovetail saw, some chisels and another type of saw to remove some waste between pins and tail boards.
Method
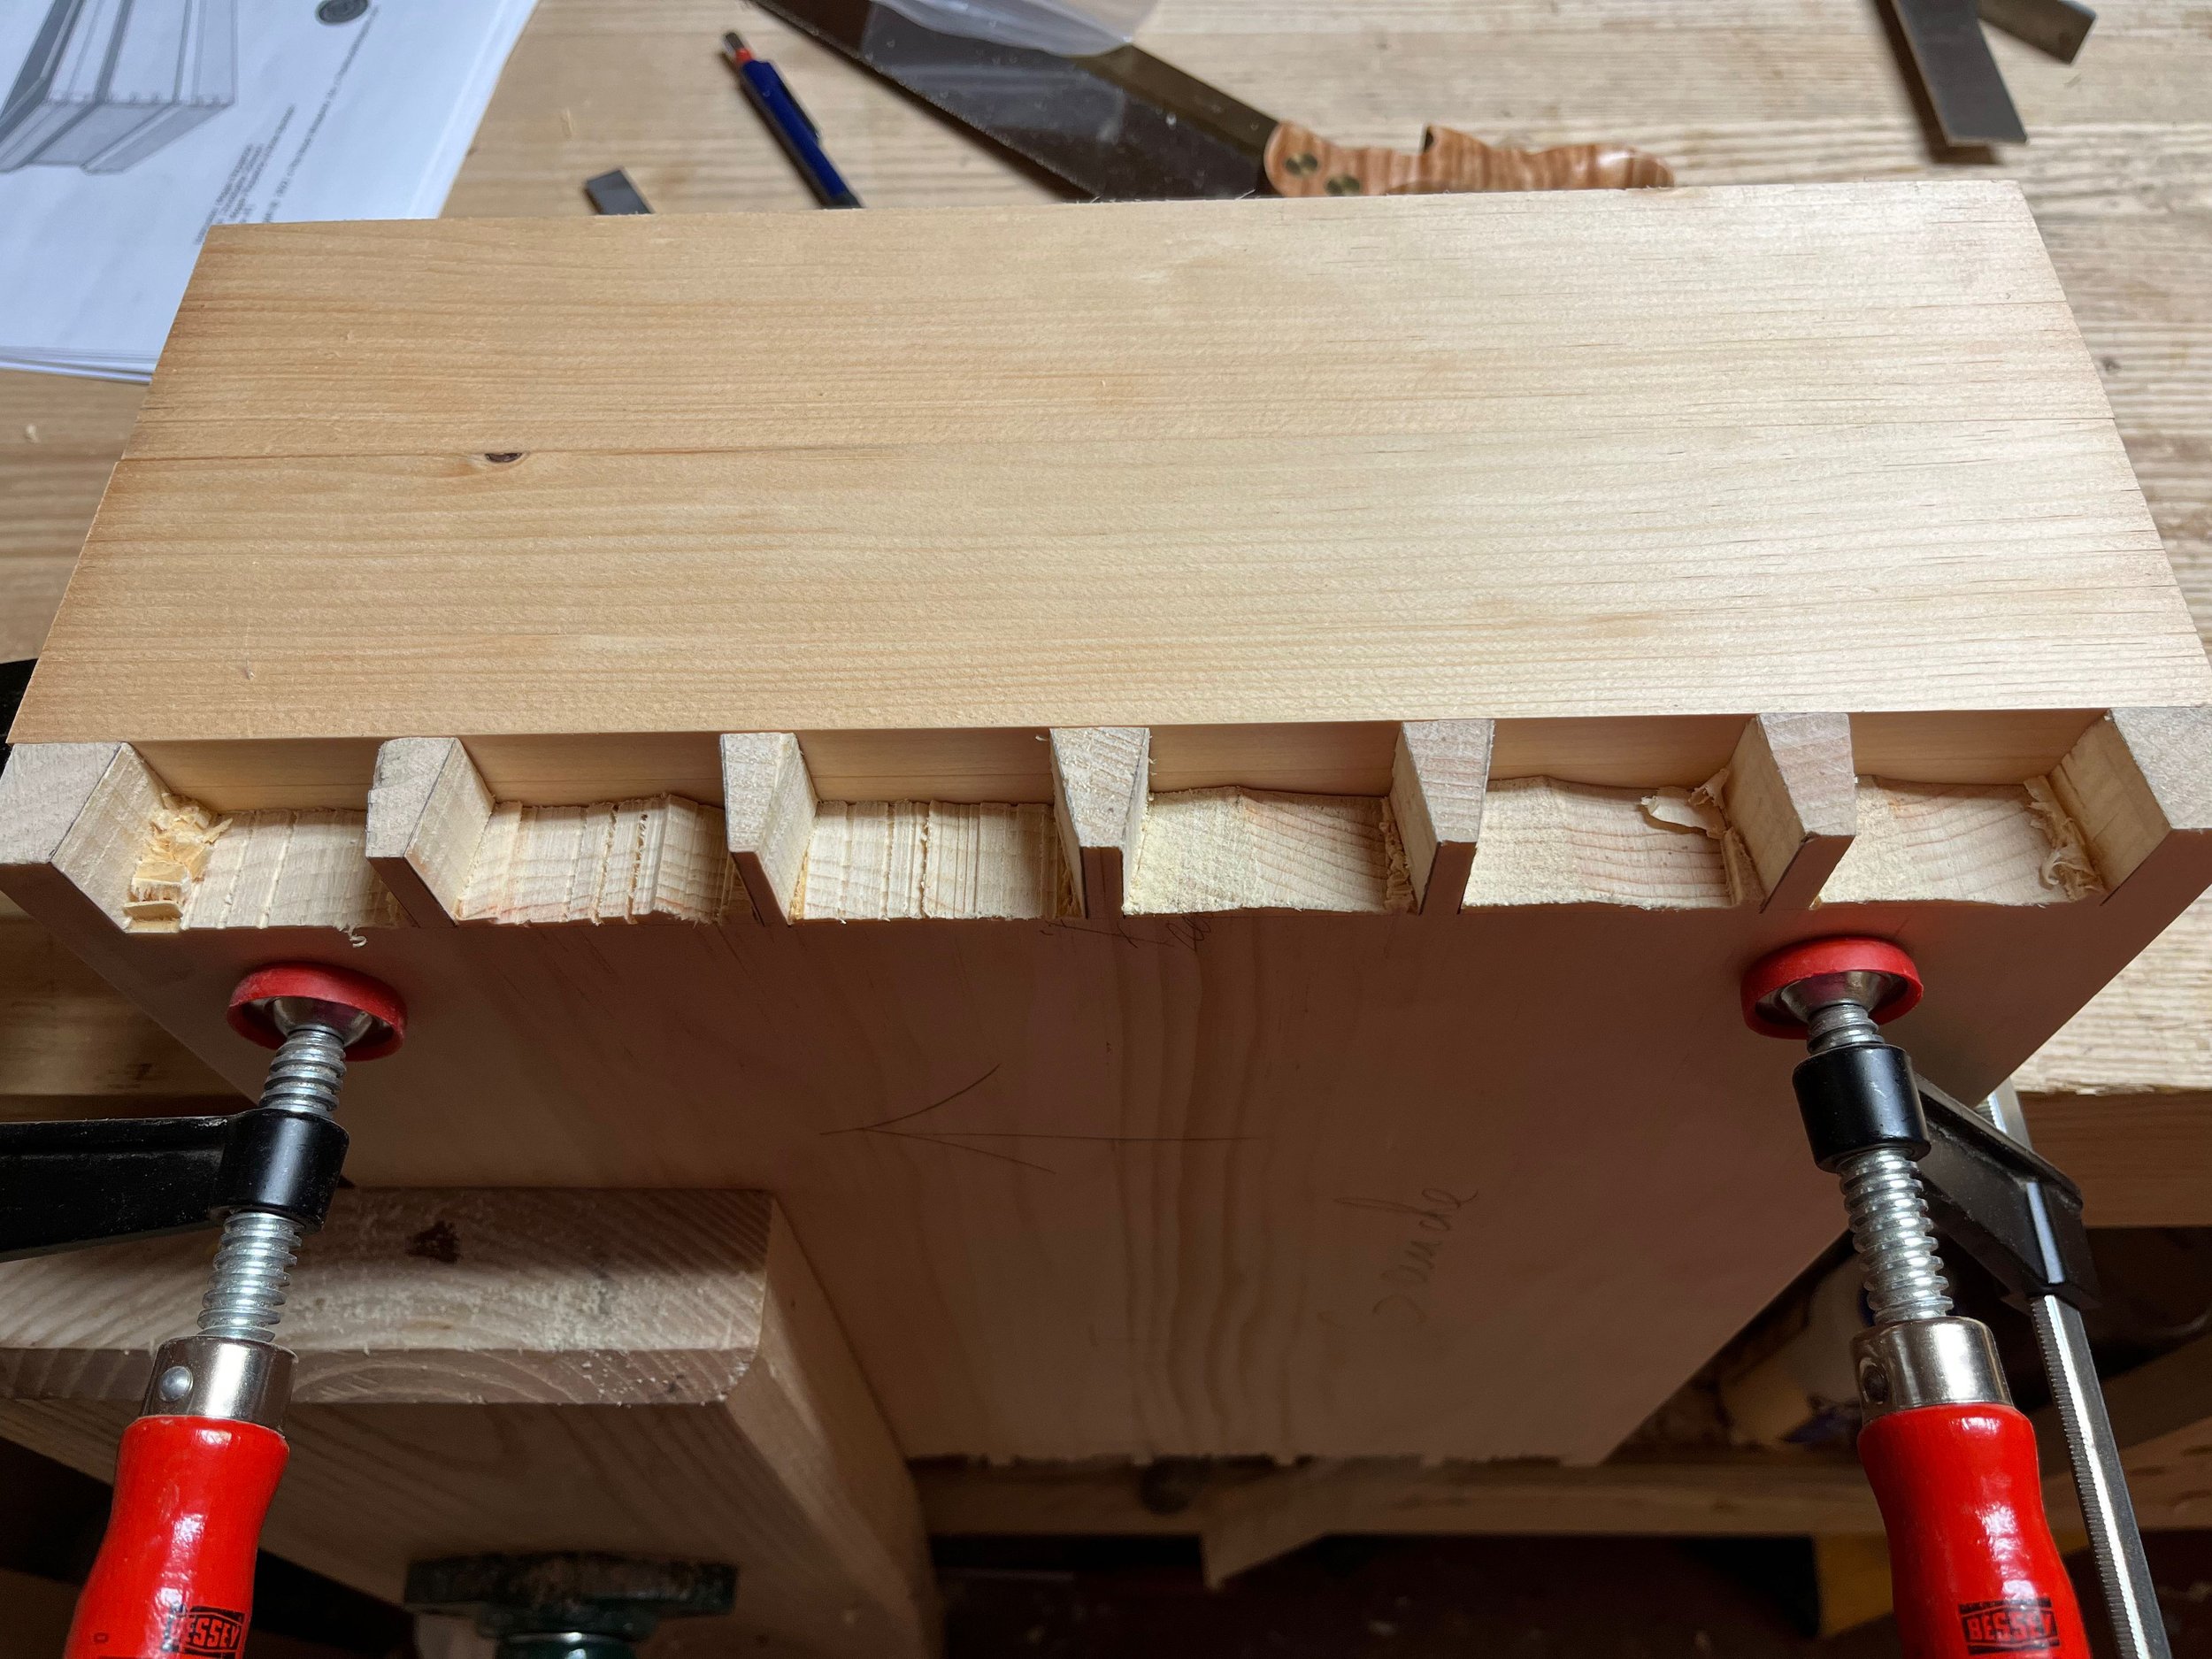
For the tail boards, typically pretty easy to do as the pins are somewhat skinny. Not too much waste to remove, depending on the spacing between the tails. But to remove the waste between the pins, depending on how big are the tails, that can be pretty fun.
Pretty much the case of this case, where the tails are pretty big and removing in between can be fun. I will typically use a coping saw or a bandsaw to remove most of the waste, trying to get as close as possible to the base line.

The jig to help
The Jig I am proposition gets it’s inspiration from an article in fine woodworking Fine Woodworking from Michael Pekovich. This version is much simpler but the use is the same, at least for one specific operation.
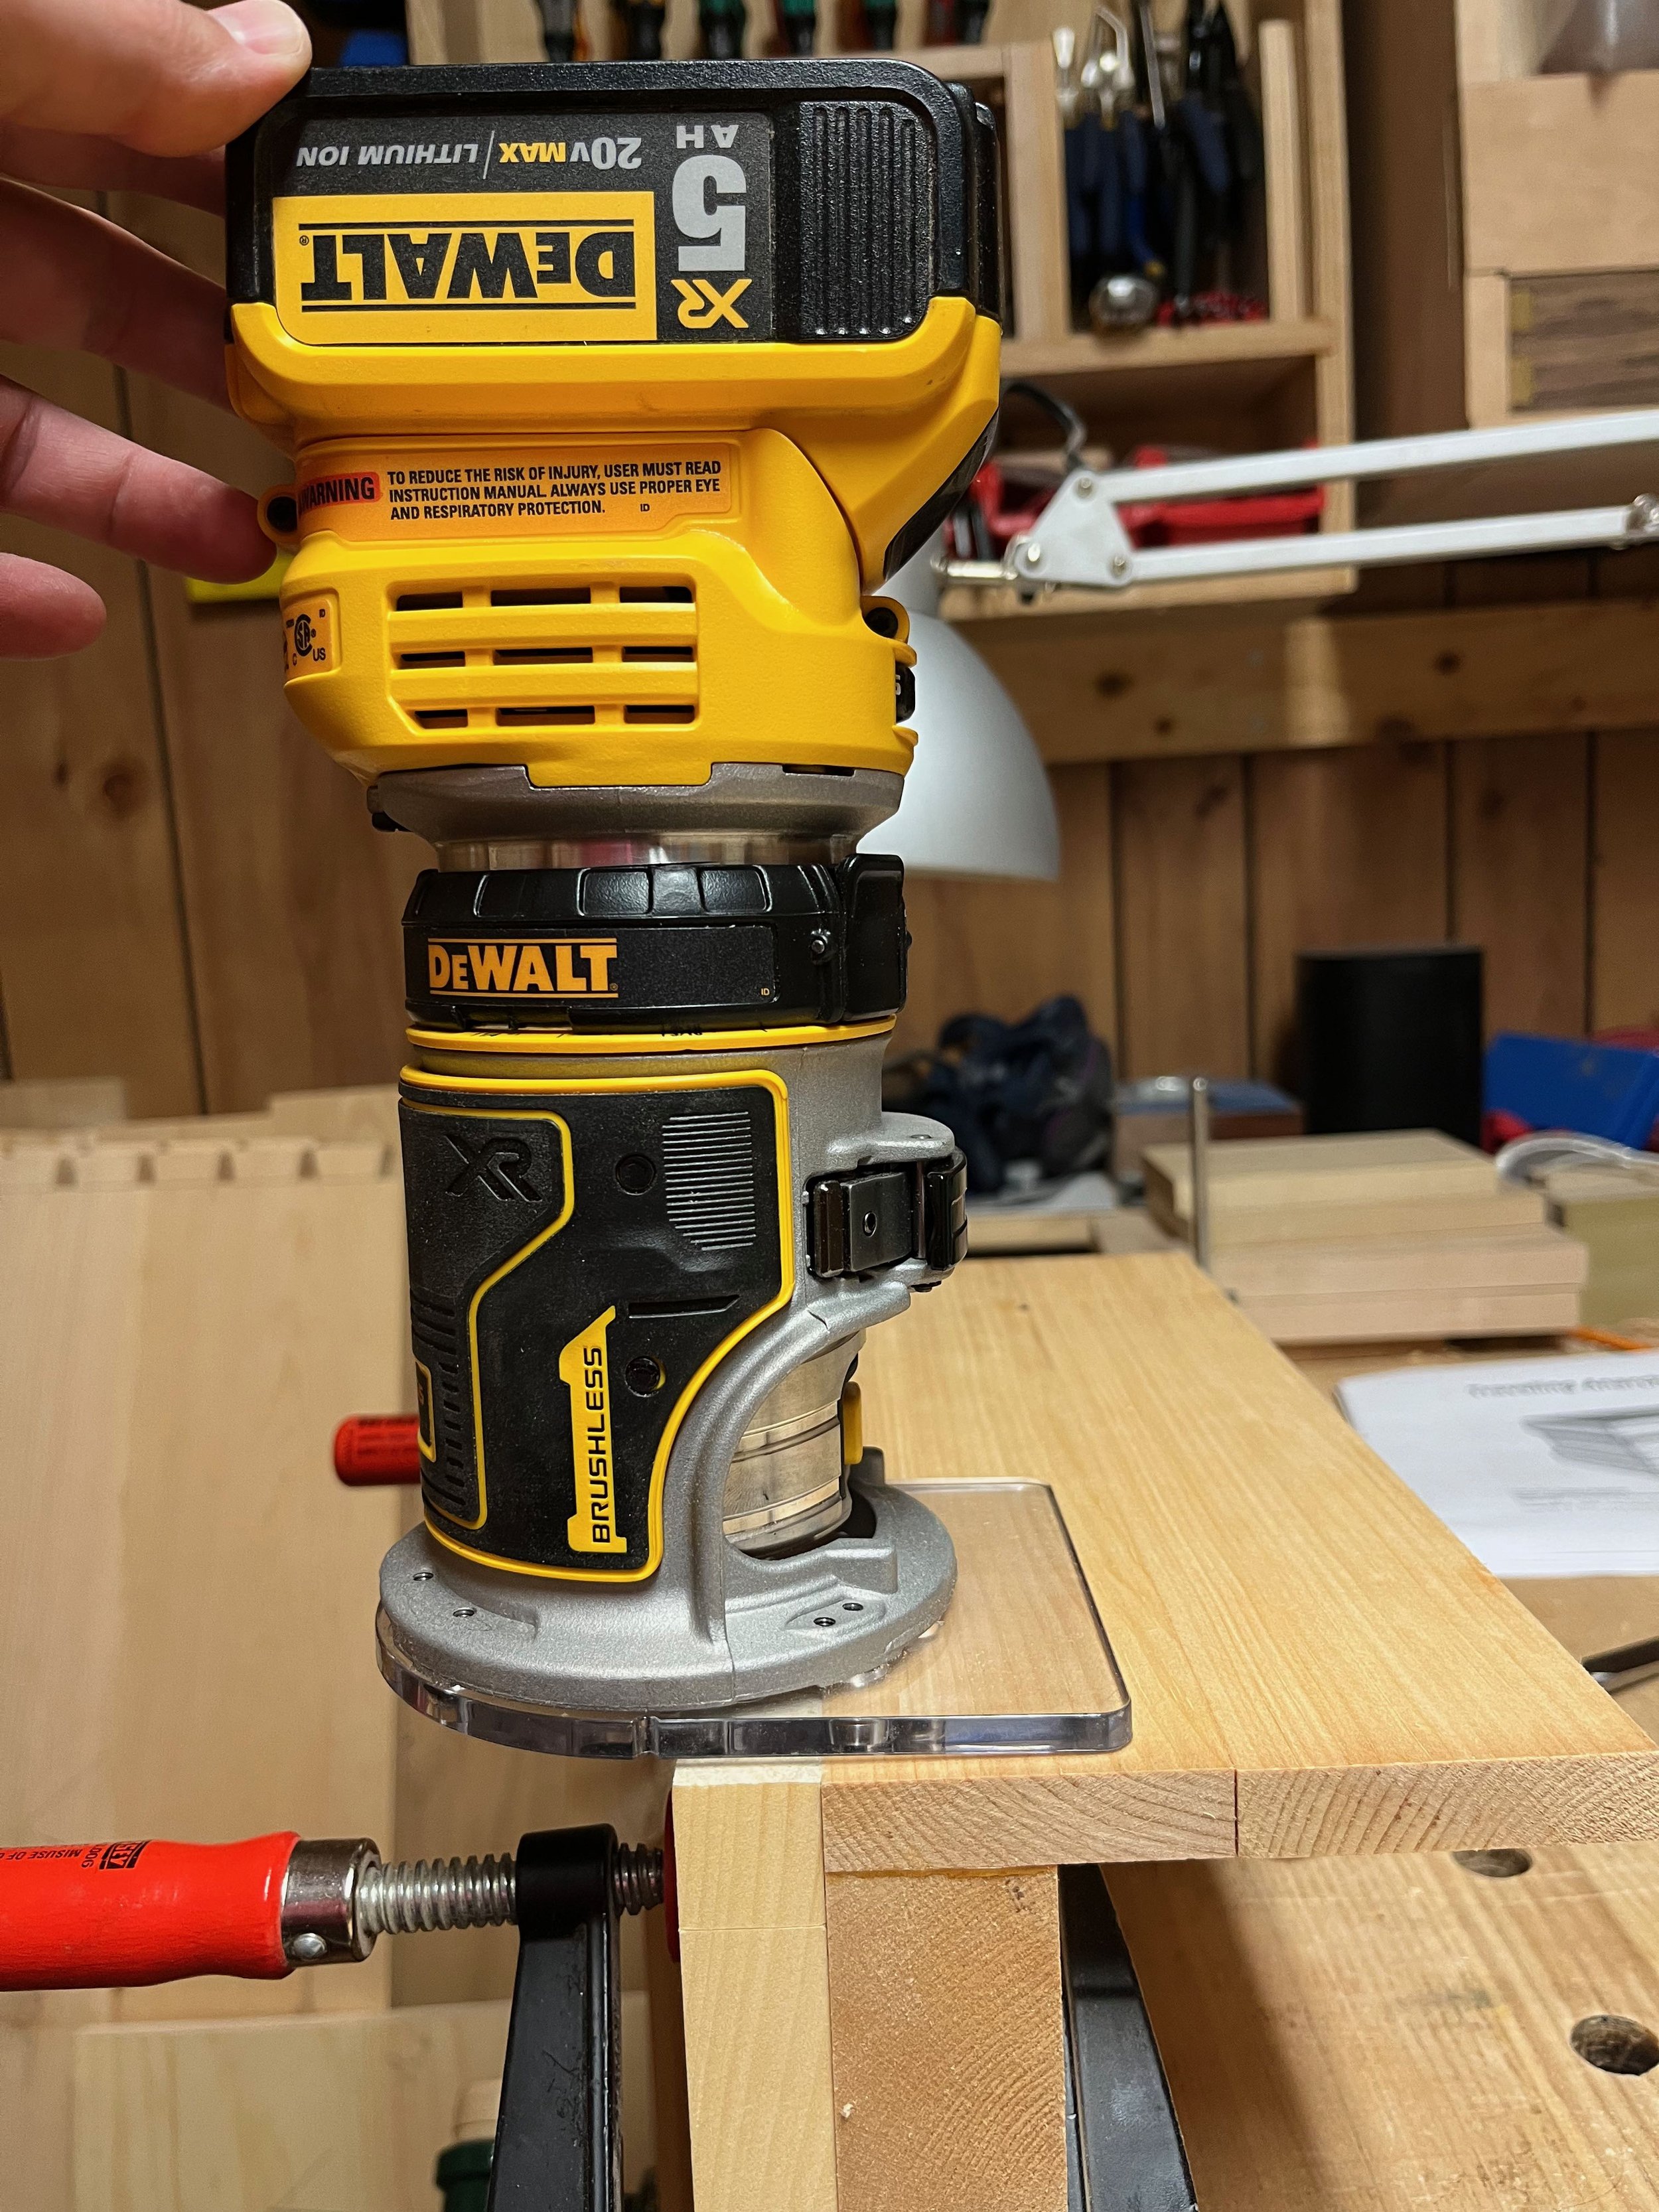
What really interests me is when to use the jig in a vertical position, to remove the material left from coping the in between pins. Getting a clean base line. For this to happen, I now use a combination of a cordless trim router and a Whiteside router bit (Whiteside 3000 series) to flush cut in between.
Adaptation
So the jig in the article serves up multiple purpose and is wonderful for stock narrower then the material I would like to use for the chest. My version is a much simpler version and can handle the size of stock for the carcass. The principal is to do a jig that server as a reference surface for the router base and as a stop to keep the router straight.
With the bearing of the router bit, it will follow the jig providing the back, not to go too far and from a side perspective, it will follow the pins that were cut prior.
Construction
The jig is pretty simple to do, 2 pieces of wood, in an L shape, forming a 90 degree support. The pieces of wood should be long enough to cover how large are your pieces of wood you want to pair the jig with.


On the picture above the pieces with the lesser thickness serve up as the router base. The thicker piece goes against the piece you are cutting the dovetails. The thicker piece serves up as the backer board to stop the router bit. This is what I had as pieces to fit. Any pieces can fit to this jig.
One thing that is pretty important is, as you glue them together, they end up at a perfect 90 degrees. This will impact the cut of the bit if not a perfect 90, affecting the baseline. The thickness does not really matter that much, as long as nothing flexes.
The result
Now that the jig is built, time to make some cuts and go through the 4 corners of the chest. Might also serve up for other components, will see. Not there yet in the built portion. As mention, the end result is pretty simple, no need to be very fancy but nothing prevents you do so. Spice it up to your licking.
Some comments :
The router bit can be a small one, so be cautious on the amount of wood you remove with it. Remove most your material before you take too much of a big bite with this setup.
Make sure the jig is a perfect 90. Potentially affecting the cut up to the base line. Also make sure there are no small pieces between the jig and the piece of wood you are cutting.